If you received seeds from Edible Evanston’s seed swap in the spring, you can save seeds from the vegetables you grew! Choose to save the seeds from your healthiest, best producing plants. Before you go to the effort of saving seeds from your annuals, here are some questions to ask:
- Is this plant variety open-pollinated or a hybrid? Hybrid varieties are created by crossing two different lines. Seeds from hybrids will not reliably produce the same plant as the parent.
- Does it self-pollinate, or cross pollinate with other individual plants? How many varieties in that species are growing nearby?
Some open-pollinated plants are pollinated with their own pollen and others need another plant of the same species to be pollinated. Self-pollinated plants are most reliable for novices and those growing many varieties in smaller spaces.
For open-pollinated plants that are not self-pollinators, isolation distances from other varieties are critical for many of these plants to breed true. You may get some surprising squash, for example, if you (or your neighbors) were growing other varieties. You also need a minimum number of plants in that species in order to reliably have viable seeds.
Best seeds for first time seed savers are open-pollinated, self-pollinating plants such as:
- Tomatoes:
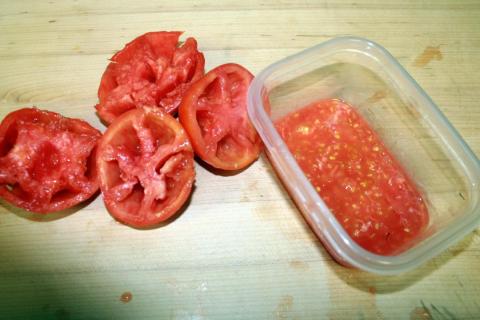
Allow fruit to ripen on the vine. Tomato seeds have to ferment, so cut open the tomato and spoon the seeds into a glass container. Add a little bit of water, close the container, and let it sit in a warm location for two or three days. Every day, stir the seeds a little bit and re-cover the container. After the three days have passed, skim the gunk off the top of the water and rinse the seeds in a fine sieve or on a piece of cotton. Stir the seeds while you rinse to get as much gunk off as possible. Drain the seeds and lay them out on a paper towel or piece of cotton in a single layer until they dry. It can take up to a week for them to completely dry, but once they stop sticking together, you are ready to store them (in a cool dry place with a clear label and date!).
- Peppers:
Allow fruit to ripen on the plant, and start to wrinkle, remove the seeds from the pepper and lay out to dry.
- Peas and beans:
Allow the pod to ripen and dry on the plant. You will hear the seeds rattling inside the pod. You can store the seeds in the pod until planting, or lay the pods out for about 2 weeks to dry then shell them.
Photo by John Porter from: http://blogs.extension.org/mastergardener/2013/09/19/seed-saving-in-the-fall
